Zaprite offers the ability to connect a BitGo Wallet enabling users to accept bitcoin payments directly to their secure multisig custody.
The following guide outlines the instructions for creating an Access Token for your BitGo Wallet and connecting it to your Zaprite Checkouts. If you are not yet a BitGo customer, head over to bitgo.com to check out their product offerings.
Step 1: Create an Access Token
The first step is to create an Access Token in your BitGo account. Follow the steps listed below to Create a token for use at Zaprite.
Log in to your BitGo account at app.bitgo.com and navigate to Enterprise Settings > Developer Options and then click the [ Create Access Token ] button.
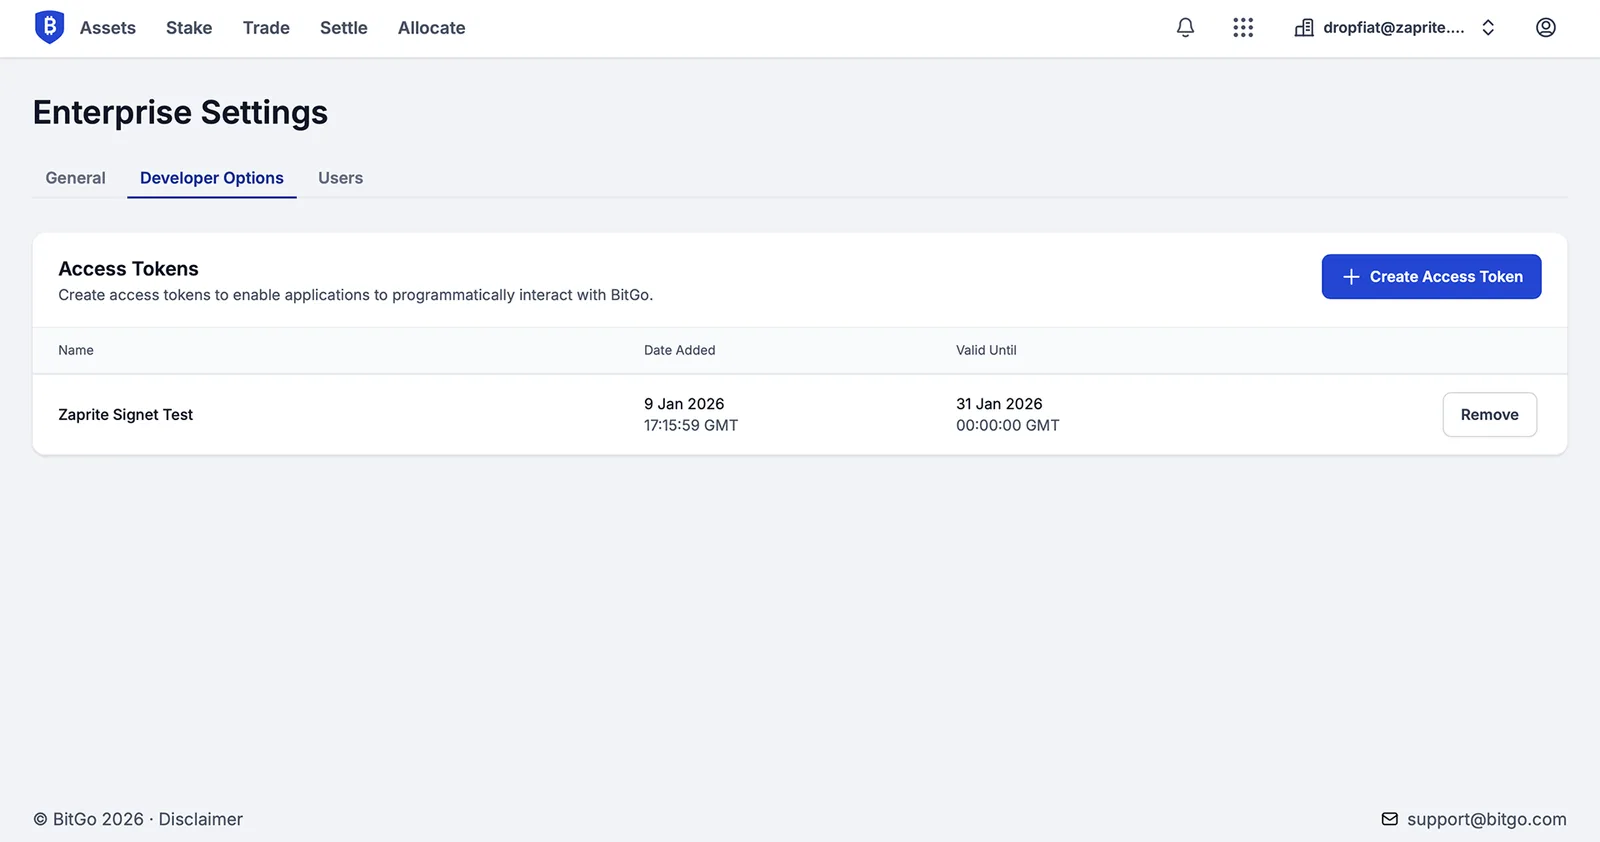
The BitGo Developer Options page under Enterprise Settings.
Instructions for creating a new BitGo Access Token for Zaprite:
| Name | Give your token a memorable name, for example: ‘Zaprite Token’ |
| Valid until | Choose a date far into the future (1 or 2 years) to avoid having to change your token too frequently |
| Permissions | Make sure you only add the following two read-only permissions: – Wallet – View all – Wallet – Create |
| IP Address | Paste in the IP Addresses shown on the Zaprite connection page. |
When you have added all the required information, click the [ Add Access Token ] button to create the token.
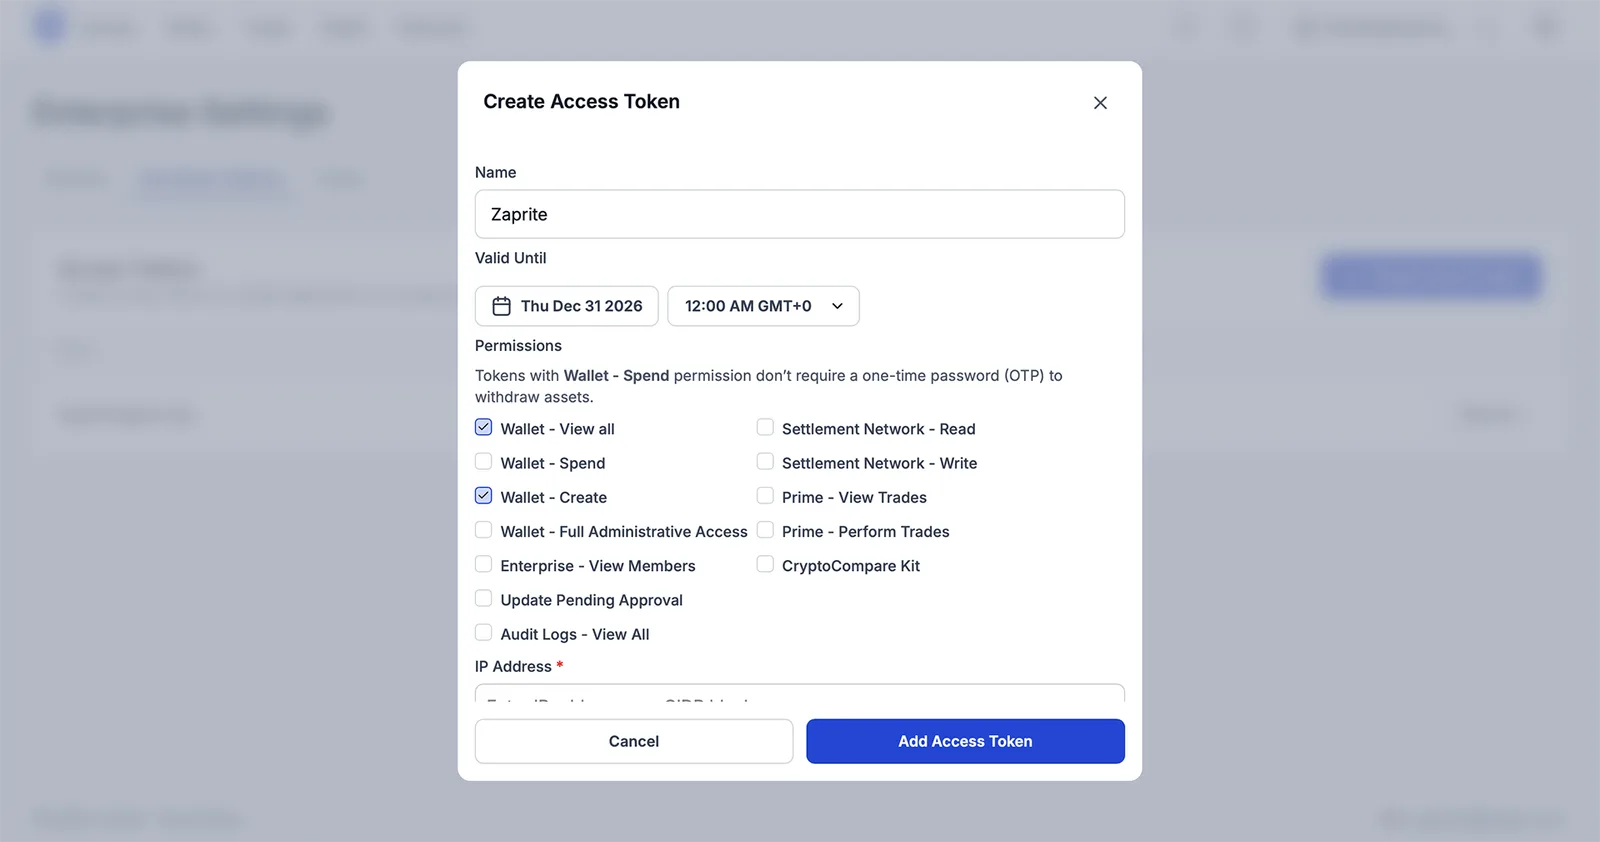
The BitGo Developer Options page under Enterprise Settings.
You will be shown your new token where you can copy the token string to paste into the Zaprite connection form.
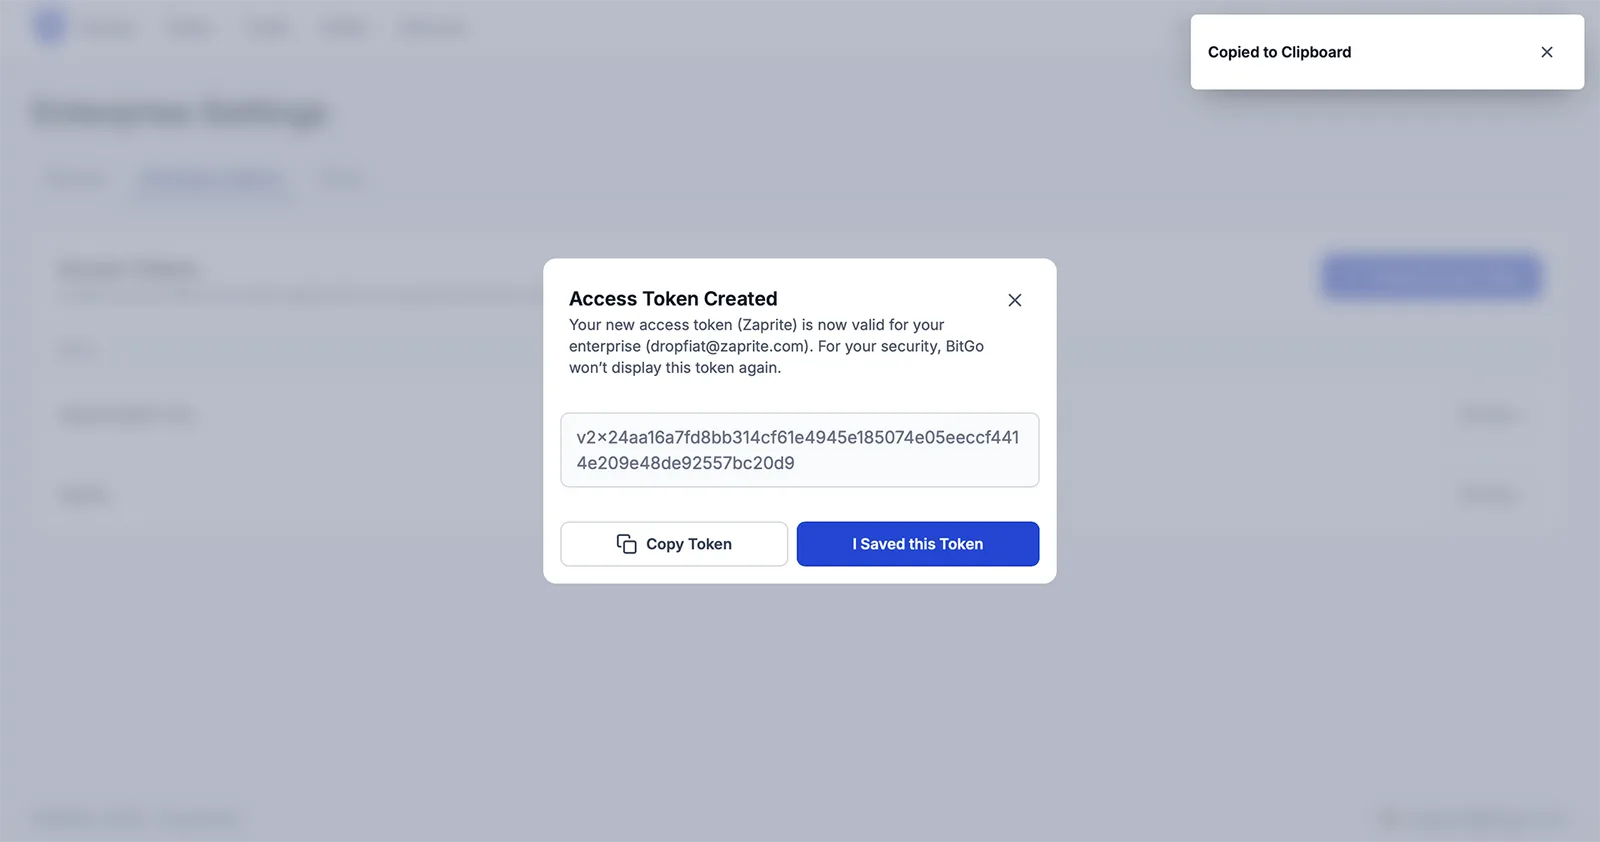
Make sure you copy the Access Token as it will not be displayed again once you close this window.
Step 2: Connect your Wallet to Zaprite
The next step is to add your wallet to Zaprite. Navigate to the Connections screen and then click the Connect button under the BitGo card.
If you already have a BitGo Wallet connected, you can click Settings, then click [ + New Connection ] from the dropdown menu.
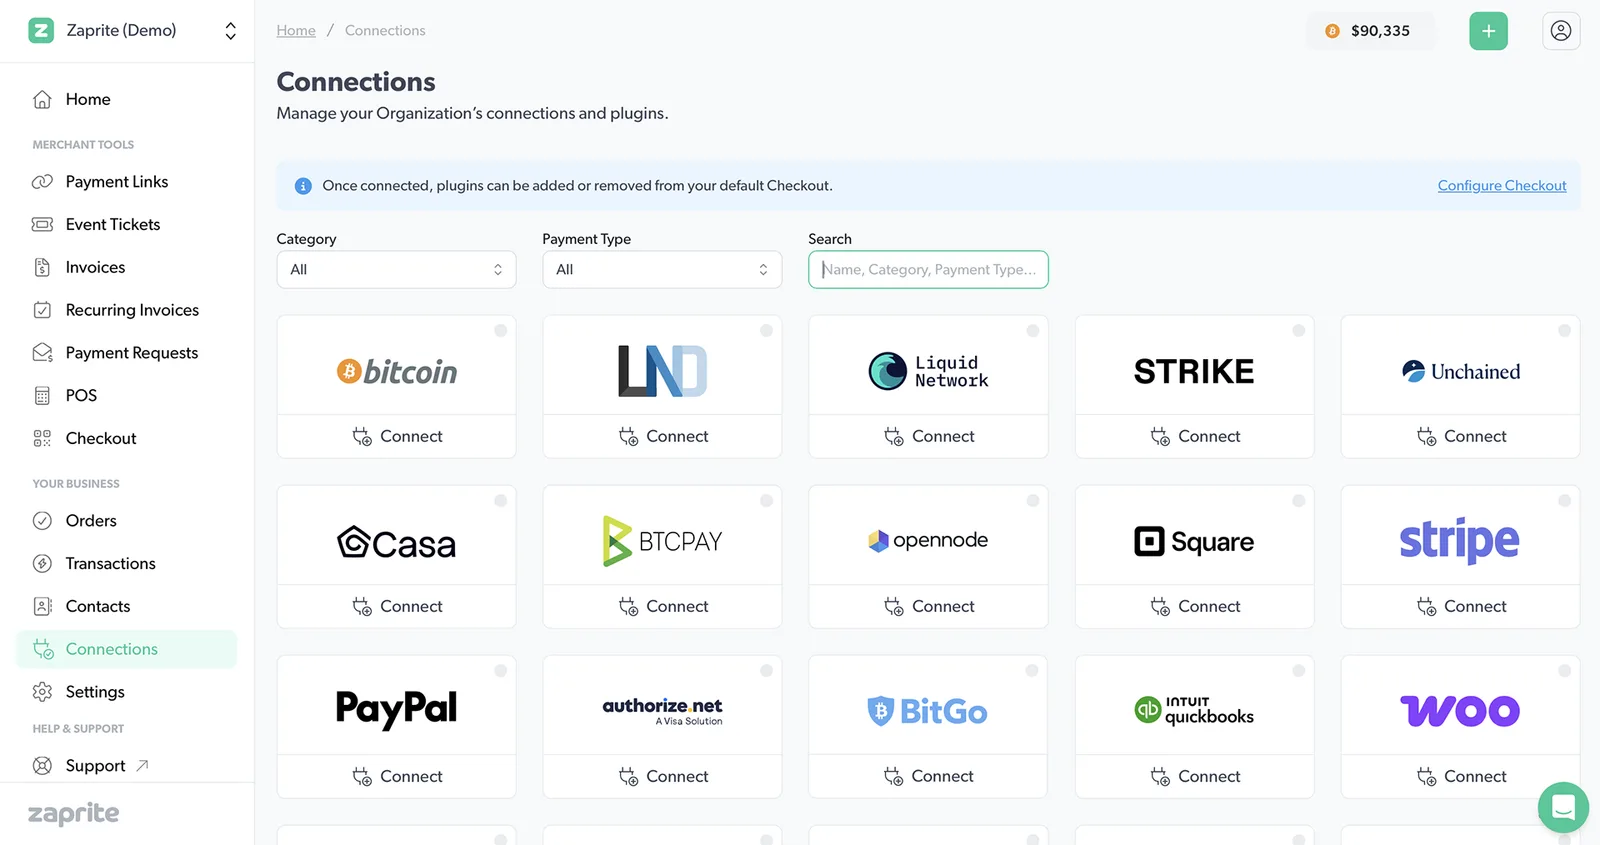
Connect a BitGo Wallet to Zaprite.
Add your Access Token
First, paste in the Access Token you created previously. Once you have done that, the Wallet selection dropdown will become available.
Choose a Wallet
Next, choose an available Wallet from the dropdown that you would like to connect to Zaprite.
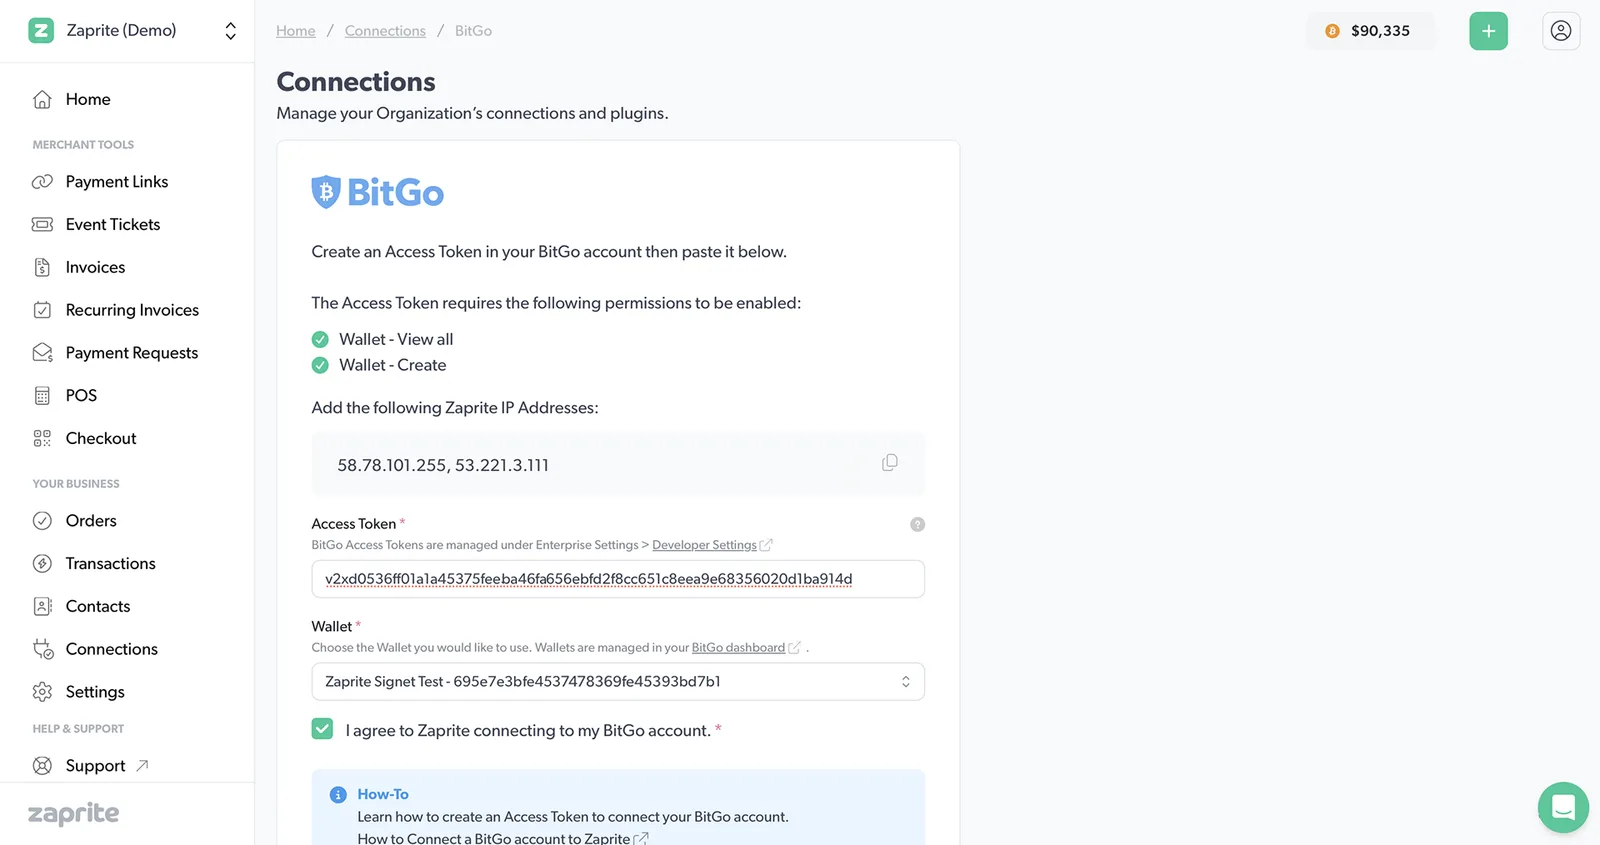
Adding your BitGo Wallet information to Zaprite.
Finally, click the [ Connect ] button to confirm the connection.
Wallet Settings
After your BitGo Wallet is connected you will be redirected to the BitGo Wallet Settings page.
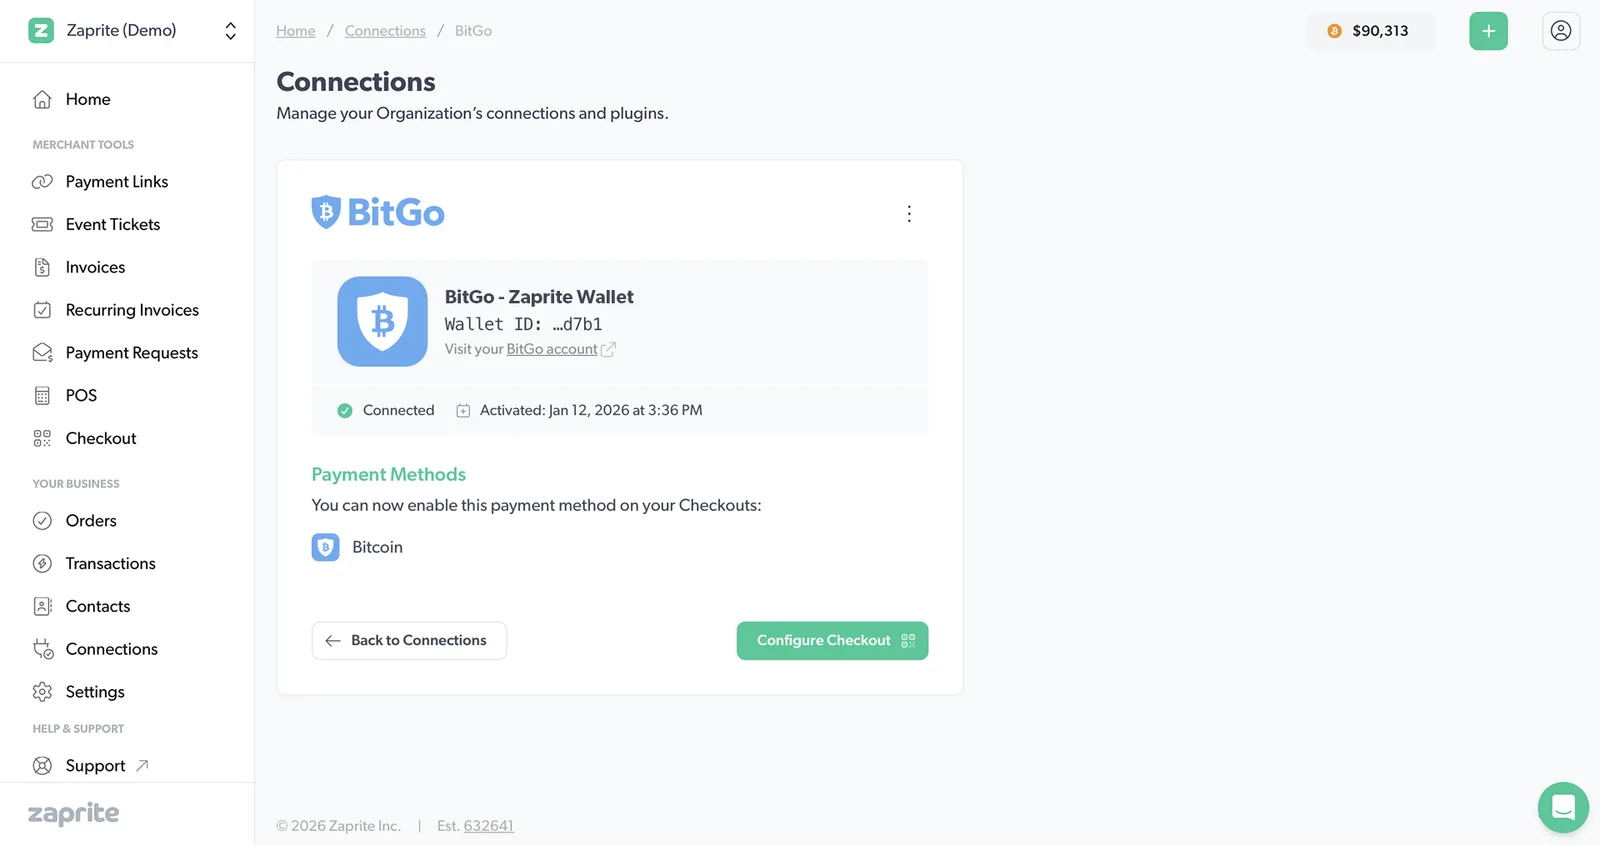
The BitGo Wallet Settings page.
This page enables you to see your connected Wallet information, and to Edit, Rename or Disconnect your BitGo Wallet at any time if you wish to do so.
Checkout Settings
Now that you have your BitGo Wallet connected, you can choose to set this as your preferred Bitcoin payment method for your default Checkout.
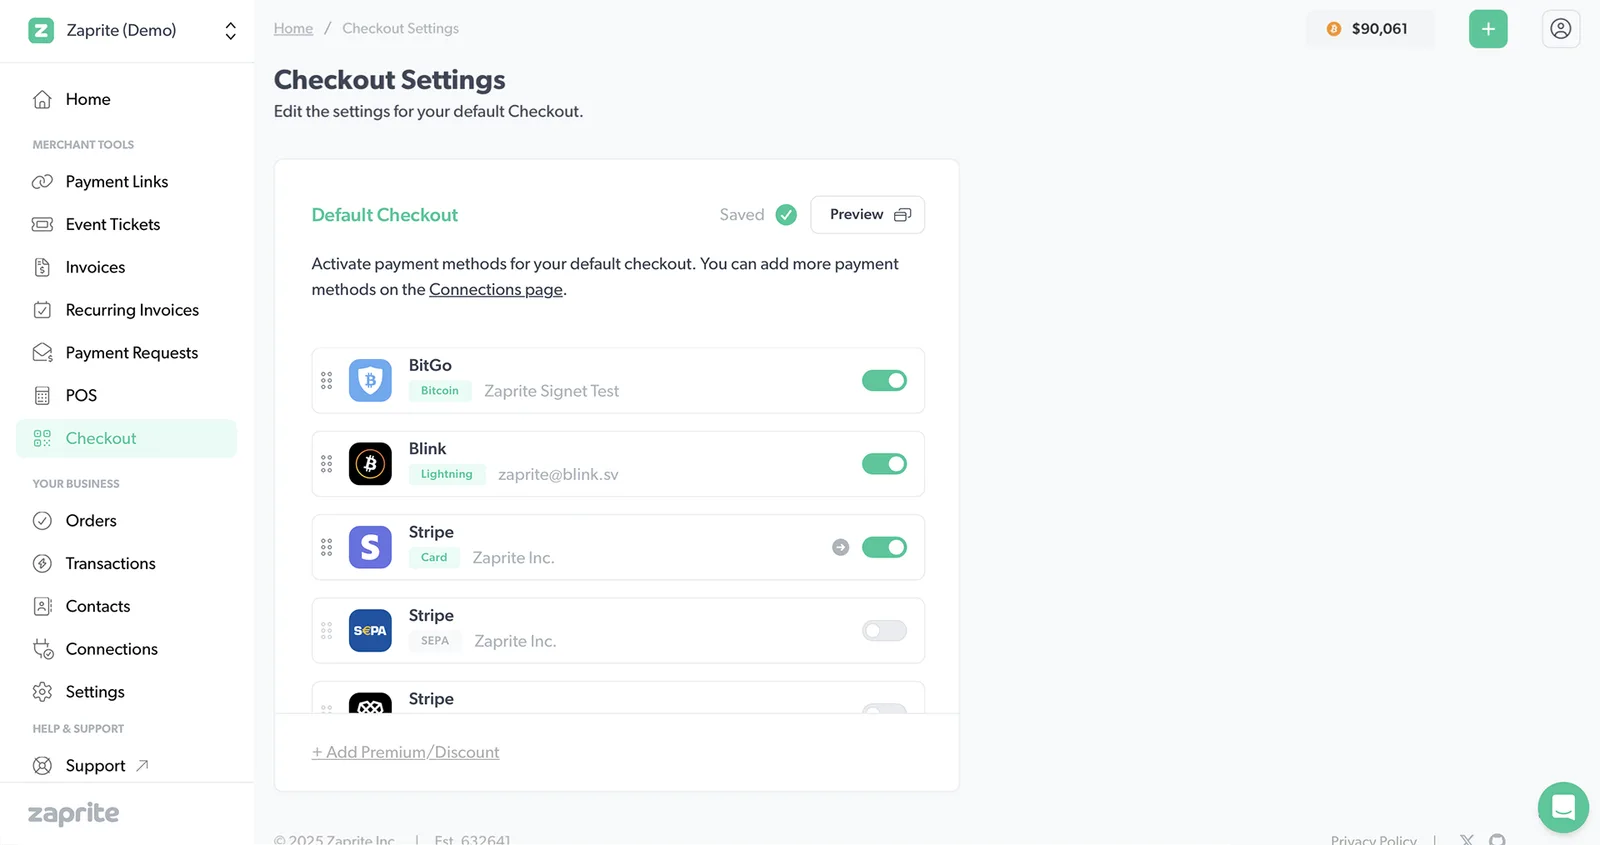
Setting your new BitGo Wallet connection as the preferred Bitcoin payment method on your Checkouts.
Navigate to Checkouts on the main Zaprite menu. Toggle on the new wallet you just connected and Confirm and then Save the settings for your Checkout. When this wallet is in use, Zaprite will derive a new unused address for each customer payment. You can always override the active payment methods on individual Checkouts for Invoices, Payment Links, Event Tickets, and API Orders.
Help & Support
If you run into any issues connecting your BitGo Wallet, or have general questions about using Zaprite, feel free to reach out at https://help.zaprite.com.